Almost every home has a laptop. This is a convenient tool that is most often used for work, watching movies and so on. He helps to be a mobile person. But the laptop operates on a battery, so if it fails, then mobility disappears. So the device will work from an electric network and will not differ from the usual stationary computer. You have to purchase a new battery. But it may be that the battery is not for sale on the device. Then the questions arise, how to repair the laptop battery yourself with your own hands, how to repair the battery controller.
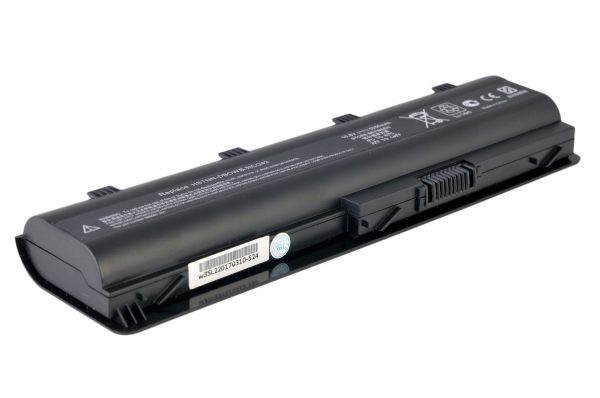
Battery
When to repair the battery?
You need to know in which situations recovery is necessary. Standard batteries usually have a life of three or four years, depending on the intensity of use of the device.
After the expiration of the service life, the battery capacity becomes two times less. The battery life of the device will be one hour.
Situations when recovery is needed:
- Battery components have spent their resources. It may be that the individual elements do not function, and the control controller is operational. In this situation, these parts are replaced. The process is called “repackaging”.
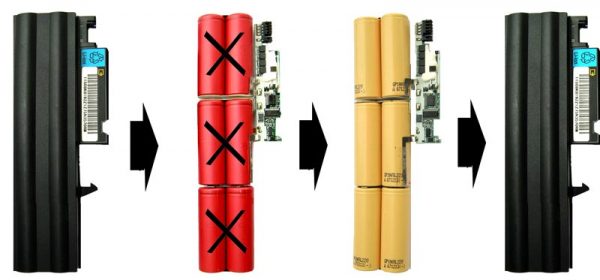
Repacking
- Battery parts are deeply discharged. In this case, they are inoperative. The control controller performs a charging unit for these cells due to low voltage. “According to” the controller, the parts are faulty and shuts them down. The main procedure here is balancing parts. The procedure is performed using the balancing function of the charger. If this does not help, it is necessary to charge each individual can.
- The battery management controller was broken. It is very difficult to find out exactly what has become unusable on the control controller. When restoring at home, replace the controller.
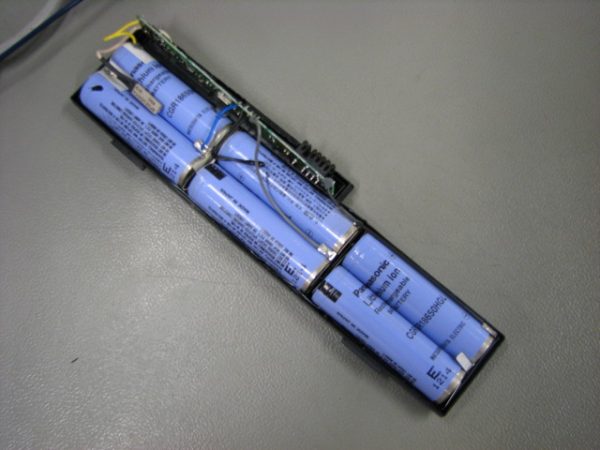
Battery structure
Necessary tools
To restore the battery of a computer device, you need to use the following tools:
- An electrical measuring device, which is called a multimeter.

Multimeter
- A knife, screwdriver or any other devices that will be designed to disassemble the case.
- Soldering iron, flux.
- A multifunctional charger that has a balancing function.
- Glue, insulating tape. These tools are required to assemble the battery housing.
- Lithium batteries.
New lithium components must have the same electrical parameters as the old ones.
Recovery process
Consider repairing the battery of any laptop in stages.
Battery Disassembly and Diagnostics
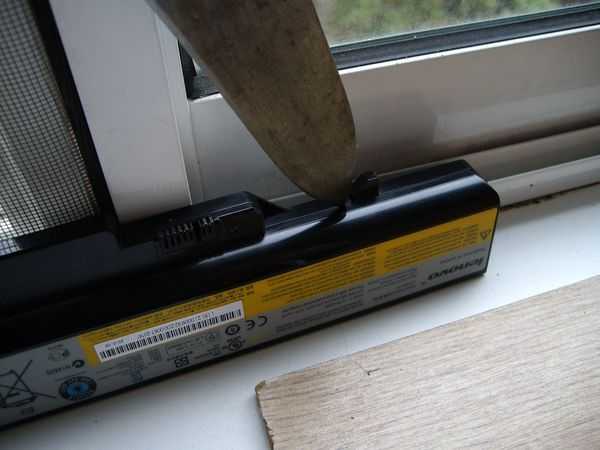
Disassembly
Before carrying out "resuscitation" of battery cells, it is necessary to disassemble and check. This is quite difficult, since the maintainability of the product is not taken into account during production. A common option for housing connections is sizing. Less commonly seen are models in which the case connection is latches. In the first case, you need to try pretty hard using improvised means.
So, follow the following order:
- First you need to heat up the seam. Use an ordinary hairdryer.
- Tap the seam with a hammer. At the same time, try to prevent the battery from warming up.
- Open the body along the seam. To do this, use a sharp tool (knife, screwdriver). Be careful not to damage anything.
After opening the case, visually inspect the inside of the device for damage. The controller must not contain burnt parts and other defects. Inspect the cans. They should not have bloating, smudges and so on.

Controller
Then, using an electrical measuring device, multimeter, check the voltage at the battery terminals.
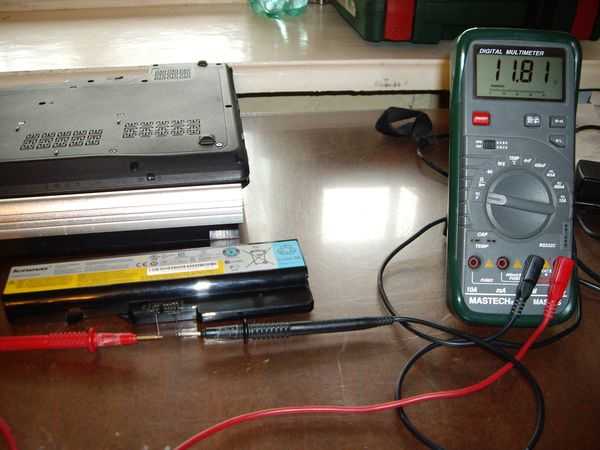
Voltage measurement
A small voltage value must be present during deep discharge and when the components of the control controller are locked. If the multimeter does not show any voltage, then the cause of the malfunction is a break in the assembly or the control controller is out of order.
Try balancing with a deep discharge. It is necessary to solder the wires from the control controller. Connect the wires to the charger in balancing mode. Next, find the points for the balancer on the board and connect the device to them. The result may not be. Then it will be necessary to disassemble the components and restore each individually. If this also does not work, then replace with similar elements.
Battery Replacement
Before replacing the battery cells, you need to sketch the circuit of their connection. The diagram should show the connection points of the positive and negative outputs. An additional designation on the diagram should have soldered assemblies, as well as their connection to the control controller. If there is a temperature sensor, sketch the place where it is soldered.
Before you reanimate the battery, you need to find new parts. Labeling old battery jars will help here. So you can find out the exact electrical specifications.
Most often, computers have 18650 lithium batteries in their possession. Their voltage values are 3.7 V, and their capacity is 2200 mAh. But these figures may vary. For example, the voltage value may be 3.6 V and the capacity 2600 mAh.
Spot welding helps connect elements during battery assembly. At home, such a “trick” cannot be done. Therefore, the connections should be soldered. As a replacement for the tape, you can use copper wires. With careful disassembly of the battery, the connecting tape could remain. It can be used for assembly. Try to solder quickly. This is necessary so that the banks do not overheat. At the end, it is necessary to solder the temperature sensor and the control controller.
Battery assembly
After the previous stage of the recovery process, you need to measure the voltage at the terminals with a multimeter. The indicator should almost coincide with the rated voltage of your battery. Then carry out the assembly of the hull. Most often, the assembly of the body is gluing. To do this, you need universal glue. If the glue does not help, then electrical tape will do. If there are latches on the body of the battery, nothing should be difficult.
Then you need to insert the battery into the laptop. If necessary, charge it.
Calibration
Battery calibration is another recovery option. For this, there are specially designed utilities that run the cycle. The cycle includes full charge, full charge and re-full charge of the battery.
This process usually lasts a day, but the malfunctions of the controller will be eliminated, as a result of which the capacity and the duration of the operation will increase.
Battery Recovery for Asus and Dell Notebooks
It all starts with opening the case. One has to be careful. To work, you need a screwdriver or a knife, an electrical measuring device (multimeter), a soldering iron, a small car bulb, cyanoacrylate glue.

Cyanoacrylate adhesive
At the very beginning, it is necessary to find a seam that divides the body into two equal parts.Carefully disconnect them and open the battery. The halves are usually glued, so you have to try.
Most often, there are 6 standard elements and a controller in the “guts”. Asus and Dell models wiring are thin, and the board does not have a clear fix. Therefore, you need to act carefully.
Before restoring the battery pack, you need to reset the battery voltmeter. When the voltage value of 4.2 V is reached in the cells, the battery voltmeter indicates that the battery is fully charged. But after a certain period of time, the controller begins to give readings that are inaccurate. For this, it is required to reset the data.
Next, we proceed to the direct restoration of the battery. It must be discharged. Then, voltage is measured at the terminals of each individual element using an electrical measuring device, multimeter. If the value is less than 3.7 V, the bank needs to be replaced with a new one.
After that, you do not need to charge the battery immediately. It should "level" the voltage values throughout the compartment. Discharge each battery to 3.2 V. To do this, use car bulbs. When the indicator is 3.2 V, start charging the battery.
It all ends with the assembly of the battery. Two equal parts of the compartment are glued using cyanoacrylate adhesive. Wait a certain period of time for the glue to dry.
This is one of the easiest ways to "reanimate" the battery pack, regarding the laptop Dell and Asus. In principle, this algorithm is suitable for models and other manufacturers, Samsung is an exception due to its features. It is quite easy and does not require any specific knowledge.
More sophisticated methods include the use of specially designed chargers. Such devices are used by workshops that repair laptops and other devices. But for the independent procedure for repairing the battery, the above method is used, which includes the use of a multimeter and small car bulbs.
 Replacing the battery in ipad mini
  18650 batteries: description, specifications and selection
  Ni mh batteries: device, charging, model selection
  DIY battery charger
  Selection, device and charging of the gel battery, popular models