Today, mobile phones are a tool that provides the fulfillment of many tasks, for example, calls, Internet access, messaging, etc. At the same time, almost every gadget is equipped with a camera, which allows users to take pictures and create videos. In some situations, you need to transfer photos from the device, and in this material the question will be discussed in detail how to transfer photos from a phone to a personal computer.
Ways to transfer photos
To begin, consider the methods of transferring images from phone to computer:
- The easiest way to transfer photos from an Android phone to a computer is to use a USB cable. This includes the transfer method using the SD card and Cardreader.
- The second method involves transferring using a wireless adapter. This option is the most convenient, you do not need to use wires and additional tools. Wireless connection is possible on laptops and desktop computers. On desktops only when using an adapter.
- There is an option to use a home wireless LAN. This option is implemented using WiFi Direct technology.
Data Transfer Methods
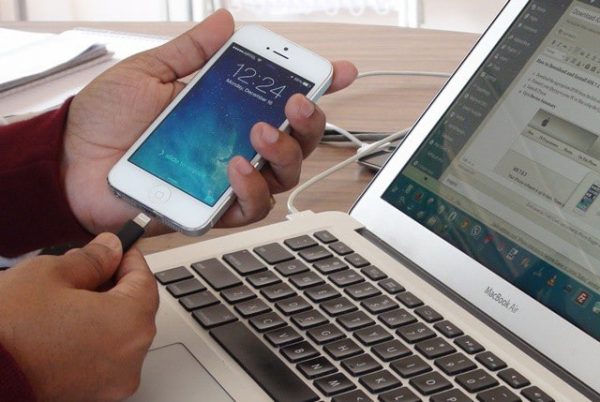
We use a USB cable to connect a PC and a phone
As a rule, taking photos and videos takes up a lot of memory on the internal drive. To free up space, you can transfer old photos to your computer’s hard drive. Most phones are equipped with a Micro USB Type-B communication connector.
Instruction:
- First you need to install the appropriate driver on a personal computer or laptop. For the Android operating system, you need to use ADB. Download the ADB Driver Installer from the official website of the developer.
- After the drivers have been installed, you need to connect the phone to the computer with a USB cable.
- After that, the process of initializing new equipment will begin. You need to wait a bit, as the process may take some time.
- Then you need to configure the connection between the smartphone and the computer. To do this, select the standard MTP interface. When choosing this interface, users will be able to transfer any multimedia files.
- Next, a new "AutoPlay" dialog box opens, where you want to select "View multimedia files."
USB connection
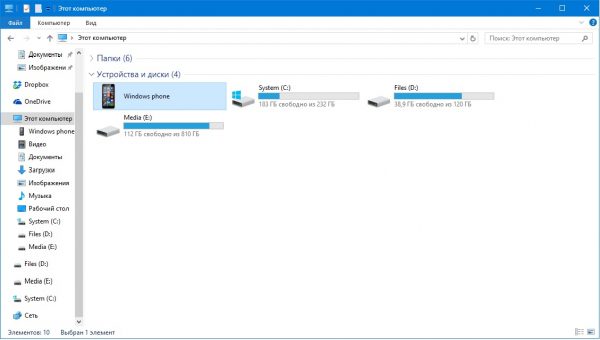
- Then open the “Internal storage” section and look for the folder with photos. As a rule, photos taken on the phone’s camera will be located in the “DCIM.
- Go to the “DCIM” folder and select the necessary files, right-click to open the context menu, where we select “Cut” or “Copy”.
- Create a new folder on the desktop or hard drive, go to the directory and right-click, select "Paste" in the context menu. After the done actions, files will be transferred.
We use the wireless Bluetooth interface
The main advantage of this method is that you do not need to connect the phone and computer using wires. For owners of stationary PCs, you will need to buy a social USB Bluetooth adapter.
But at the same time, this option has some disadvantages. First of all, it is a low data transfer rate. Interruption of connection if the devices are at a great distance from each other. As a rule, the range of a wireless interface ranges from no more than 5 meters.
Instructions for connecting a bluetooth adapter:
- First you need to enable Bluetooth on your phone and computer.
- To enable wireless transmission, you need to use the control gesture (swipe) to call up the main settings menu and select “Bluetooth”.
- Next, turn on the option on the personal computer, for this you will need to click the advising icon on the taskbar. Then in the utility it is necessary to activate the “Device Discovery” mode. When the program detects a new device, the Add Device dialog box opens, where you need to select the icon with the name of the smartphone.
- Then you need to configure the pairing between the gadgets. A unique alphanumeric code will be displayed on the laptop screen, it must match the one also used by the phone.
- If the code is the same on both devices, select “Connection”. The process of installing the necessary software (drivers) will begin. You can also pre-install the necessary system components by downloading them from the official website of the developers.
- After that, you need to go to the conductor. Open the shortcut “My computer” and “Local drives”. In the “Other” sub-item, the smartphone icon will be displayed, which must be clicked;
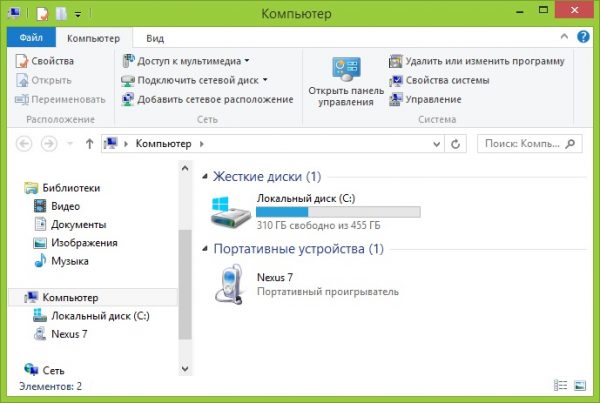
Bluetooth connection
- Select “Internal storage” and look for a folder called “DCIM”. We open the directory and select the necessary files, transfer to the PC hard drive.
Using a Wi-Fi Direct Wireless Connection
For this method, you do not need to install any special programs. You only need to install one application on your smartphone in order to ensure that your photo is downloaded from mobile to PC. The data transfer scheme is implemented through an FTP server.
Instruction:
- First of all, you need to download an application to create an FTP server. For these purposes, you will need to use My FTP Server software. Download software from the Play Market.
- Next, download and install the application. After installation, you need to run it and configure the necessary parameters.
- We click on the “Settings” icon in the upper right corner of the program window, where you need to come up with a username and create a key (password).
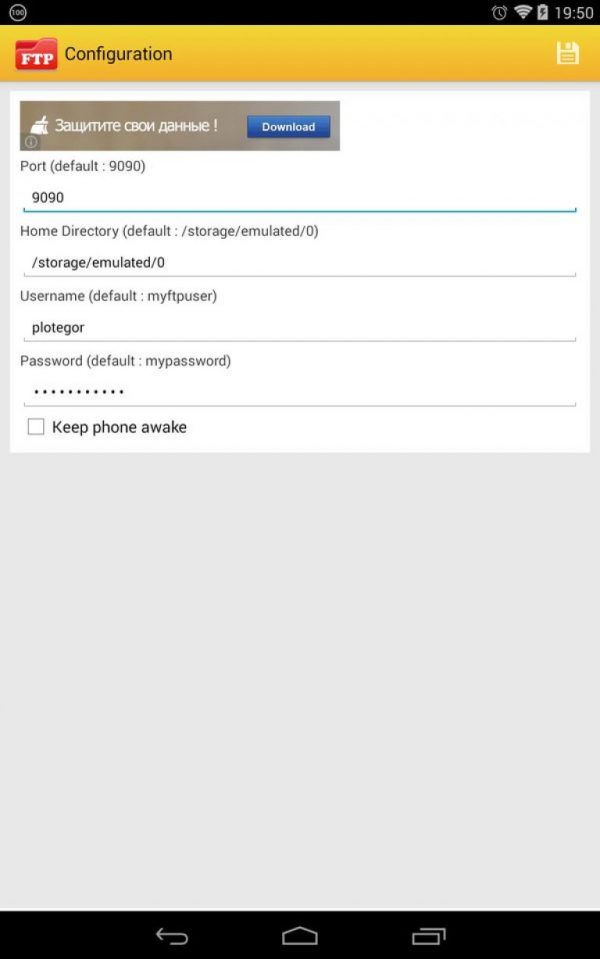
My ftp server
- Next, click on the "Start Server" button.
- Then you need to connect your phone and PC. To do this, open the explorer by clicking on the "My Computer" shortcut.
- We click in an empty place to call the context menu and select "Add new equipment to the network environment."
- A new window “Add network location” will appear, where we select the item “Choose another”.
- In the new dialog box, enter “Network Address”, which is available in the main window of My FTP Server.
- Then specify the username and password.
- After the New Network Hosting Wizard initializes, a message appears indicating that the new item has been successfully added.
- We go to the conductor, in the section "Local disks" appears the new equipment "Network Placement".
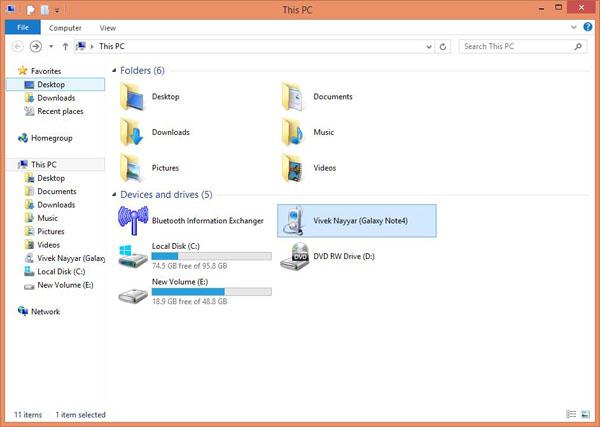
Device selection
- We start the element and enter the key specified above (password).
- A new explorer window will open where the internal directories of the smartphone will be available, including the folder with photos. Data can be transferred or deleted.
Errors while transferring photos
Next, we consider the main errors that occur when copying photos from an Android phone to a computer:
- Most often, when connecting via a USB cable, problems are observed on the operating systems Windows XP and Vista. Errors can be related to incompatible drivers. The way out is the transition to a newer version of the OS.
- If the connection via Bluetooth fails, you need to download compatible drivers. It is best to use the default Bluetooth utilities for this interface. For example, Lenovo laptops have a built-in utility called “ReadyComm” that allows you to control the data transfer process.
 Main problems and repair Xiaomi Mi 8
  Why iPhone Fails
  Where to buy the original iPhone X