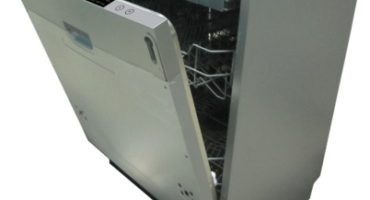
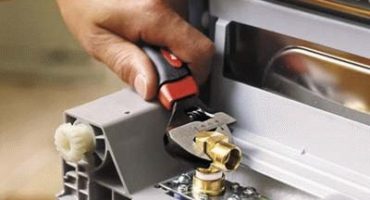
Currently, no one doubts the use and convenience of dishwashers. These relatively compact household appliances have become an indispensable assistant in any kitchen, no matter the kitchen of a large family, single, business woman or senior citizen. You get used to good things quickly, and when suddenly the dishwasher does not fulfill its functions, in particular, it does not heat water, as a result of which unsatisfactory washing results are observed, it is just right to sound the alarm.
Note that this failure is most often associated with a malfunction of internal elements: heating elements, sensors, control module, therefore dishwasher repair can do a tidy sum. But if you have at least minimal skills and want to save money, you can replace the components yourself, especially since the specialists of service centers will take at least 1000-2000 rubles for the provision of such services.
What tools will be needed to repair a dishwasher
Note that almost all of the above details change in the assembly. Repairing them is very difficult. Moreover, even the masters of a service center do not always undertake such repairs. Therefore, if you start from the fact that you just have to change the spare part, no specialized tools will be required.
Prepare a set of screwdrivers, pliers, a multimeter and a thick needle.
Why is the display code i20 is on - Find out in the article on the site.
Checking the health of the temperature sensor and the heater
The temperature sensor is checked, both with the help of a specialized diagnostic device, and visually. Pay attention to the contacts and wires. They should not be burnt or melted. If the visual inspection does not help, you have to unwind the dishwasher.
For health checks of the heater and the temperature sensor uses a special device - a multimeter. As a rule, it is in every house. If you have not stocked up on such necessary measuring equipment, be sure to purchase it. This tester can ring the electric circuits, check the integrity of the radio components, measure the voltage at the outlet and much more. The device has compact dimensions and combines several devices: ammeter, ohmmeter, voltmeter.
To check the health of the heater, put the device in ohmmeter mode. Pre-calculate the resistance of your heater. To do this, divide the value of 48400 by the nameplate power of your heater (see instructions). For example, if the power of the heater is 2.8 kW, then the resistance of the heater will be 17.29 ohms.
In the next step, disconnect the device from the network, get to the heater and disconnect the wires, touch the tester probes to the conclusions of the heater. If the obtained value is almost identical to the calculated one (in our example, 17.29 Ohms), the element is in good condition. If it shows 0, 1 or endlessly - the heater has failed and it needs to be replaced.
After that, we will check the element for current leakage. To do this, set the tester in buzzer mode and attach one probe to the power contact, and the other to the housing (or to the ground terminal). If the device protects, there is a breakdown on the case; if not, everything is in order.
To check the insulation resistance, set the device to megohmmeter mode and set the tester to the limit of 500, hook the crocodile to the machine body, and set the probe to one of the element's contacts. The norm is a resistance of 2 megohms and above.
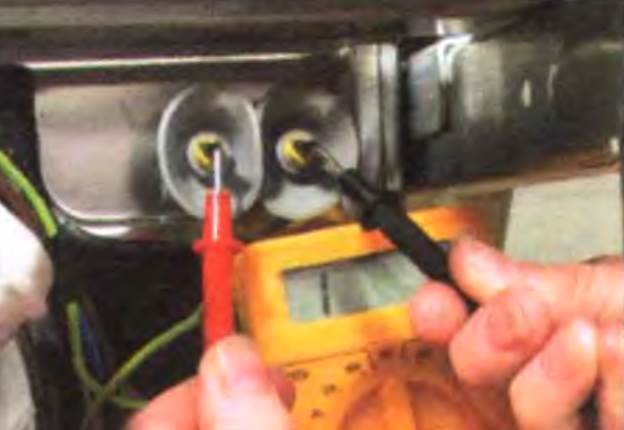
In modern models, a thermistor is most often used as a temperature sensor. This element changes its resistance depending on temperature. To check its condition, put the tester in ohmmeter mode and, connecting to its contacts, measure the resistance. Prepare a pot of boiling water in advance and place the temperature sensor there - the resistance should change greatly upwards, if not, the component is faulty.
Faulty TEN
Manufacturers strongly recommend adding regeneration salt at every wash cycle. If this is not done, the heater will quickly become scaled. In addition, the heater may fail for other reasons: burnout of the spiral, breakdown of internal insulation (in this case the dishwasher will be shocked).
If the dishwasher Electrolux or Bosch, Indesit, Whirlpool, Zanussi, Beco, Hansa does not heat the water, you will have to completely change the heating unit. In the technology of these brands, it is impossible to change the tubular heater separately from the entire unit.
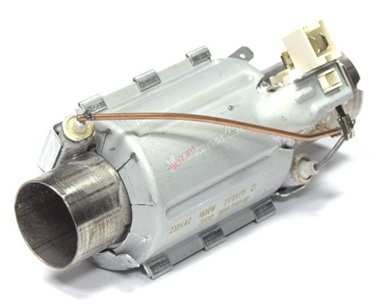
The heating unit of the dishwasher externally is a cylindrical design with bends for connecting sensors and pipes. The inside of the appliance is protected by a plastic case. If you do not know if your unit is collapsible or not, carefully consider it. If there are fasteners on the plastic case, the structure can be disassembled and changed separately; if not, the unit is not separable and the entire unit will have to be replaced.
How to change the heater in the dishwasher: a detailed instruction for beginners and not only
If you have checked and made sure that the dishwasher does not heat water due to a malfunction in the heater, buy an original or compatible part (better, of course, the original one) and start work. Separately, we note that repairs are not always beneficial to the owner. So, if your equipment is already morally obsolete, and all the details in it are worn out, it makes no sense to buy a unit whose cost is 7-10 thousand rubles.
So, let's get started.
- Open the loading door of the dishwasher and remove the dish trays from it, lay some rags on the floor with good absorbency in order to protect the floor surface from moisture.
- Disconnect the dishwasher from the mains, wait 10-15 minutes (so that the capacitor discharges, and you could not suffer from electric shock).
- Unscrew all hoses.
- Locate the plastic impeller inside the dishwasher and pull it up to remove it.
- Unscrew the filter.
- Unscrew the nuts holding the nozzle and the heating block.
- After that, turn the structure upside down.
- Depending on the characteristics of a particular model, unscrew the back wall or pull out the bottom panel (if we are talking about built-in appliances). To remove the bottom panel, disconnect the heating block from the drain hose, carefully pull the panel towards you and it will be removed. At the same time, you won’t be able to pull the panel to the end, since for this you need to first unscrew the fasteners inside the machine body.
- The flow heater is connected to a drain pump. Grasp the pump with your hands and wrap it clockwise half a turn. After that, pull the pump to the side - it will be in your hands. Then unscrew the temperature sensor.
- Bottom flow heater holds rubber fasteners. To remove it, you need to reach out under the body.
- Disconnect the fittings of the pipes and sensors, remove the burned heater, and replace it with a new one.
- After that, put all the elements back in the reverse order.
As you can see replacement of the heater in the dishwasher - A simple task, and if the unit is not separable, everything becomes even easier. Of course, various problems can arise during operation, but you will surely cope with them. So, in some models it is necessary to carefully pick up a plastic clamp with a large needle (it is important not to damage it).Something will have to be pry off with pliers. Act boldly, the main thing is to be careful.
Malfunctioning pressure switch
Another possible reason that the dishwasher does not heat water is the malfunction of the water pressure sensor. A broken pressure switch does not give a signal to the control module that water has accumulated in the device. Accordingly, heating does not occur.
To check an item, follow these steps:
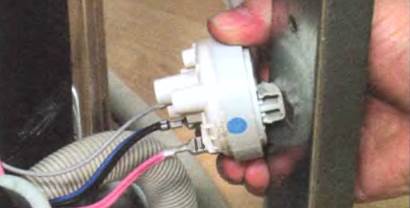
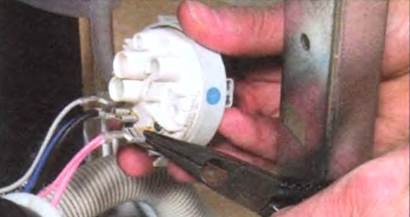
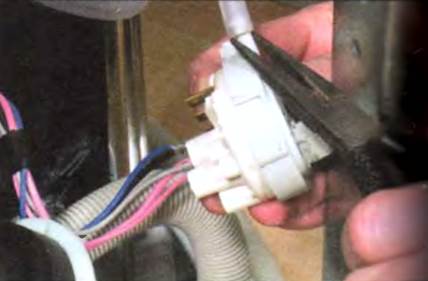
- Turn off the device and remove the pressure switch from the housing.
- Carefully pull the wires out of the terminals using pliers, after marking all the connections.
- Remove the plastic tube and blow into it. You should hear a click of the relay. If this does not happen, the item is probably out of order.
And the last one. If all of the above items are checked and in good condition, and the dishwasher does not heat the water, the control module may have failed. This is a complex unit, the diagnosis and repair of which is best entrusted to specialists. Most often, the control board cannot be repaired and you will have to change the module assembly.
 Malfunctions of dishwashers and methods for their elimination
  Dishwasher Tips
  Choosing a dishwasher
  How to restart the dishwasher
  How to restart the dishwasher, how to reset the program