The value of the compressor is great both from the point of view of functionality, and from the point of view of the cost of the metal, and regardless of how to consider it. From the engine, you can make a pump for tire mounting, painting or refrigeration.
If the engine is inoperative and its power is relatively low, then there is no point in repairing it. The device consists of ferrous metal (housing, gear components) and copper (motor winding, tubing). The average weight is from 5 to 10 kilograms, while the weight of expensive copper can reach 1.5 kilograms.
Disassembly without the use of a grinder
In order to separate ferrous metal from copper, you must first disassemble the compressor. We will figure out how to disassemble the device without using an angle grinder (grinder), because the grinder is a relatively dirty tool, there will be a lot of dust, sparks, noise, oil poured into the workplace (the cutting disc will spray materials around it).
Unfortunately, the case is a monolithic metal product containing a number of welds created by automatic welding.
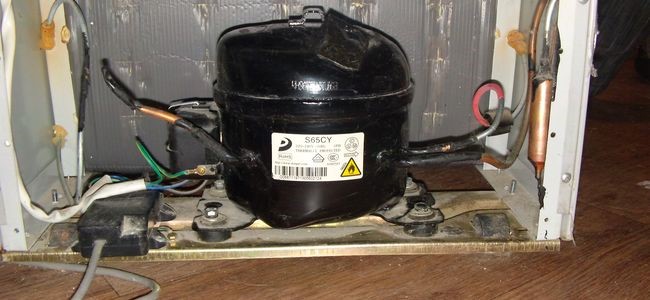
The compressor is a monolithic device
Therefore, you can avoid the grinder only with a hacksaw for metal. The thickness of the metal can be more than 3 millimeters. As for the rotor and stator, the grinder is not required, it should not be used at all stages of disassembly.
Action algorithm
In the welding area you need to make an incision, drain the oil and "walk" along the entire seam.
The notch should be small in order to avoid splashing. Through a small hole, oil should flow out slowly.
It should be cut carefully, without haste; if you work with a hacksaw, you should monitor the sharpness of the saw (it is better to stock up with spare blades). Under the cut-off cap, motor windings are observed. After unpacking the case, you can find the causes of the malfunction of the device. In our case, the cause is a burned-out winding:
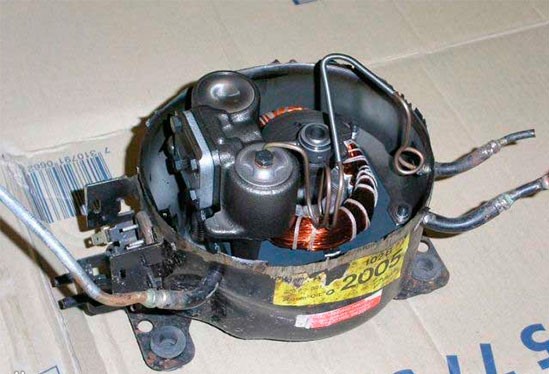
Blown, soldered winding - the most common cause of failure
Ways to disassemble a compressor
There are two ways to disassemble: knocking out and cutting the back cap. Thin-walled models very easily come out of the case when knocking out, older models are almost impossible to knock out. If all the oil has been previously drained, then you can immediately proceed to sawing without performing trial cuts. With a hacksaw, we cut the “back cap”.
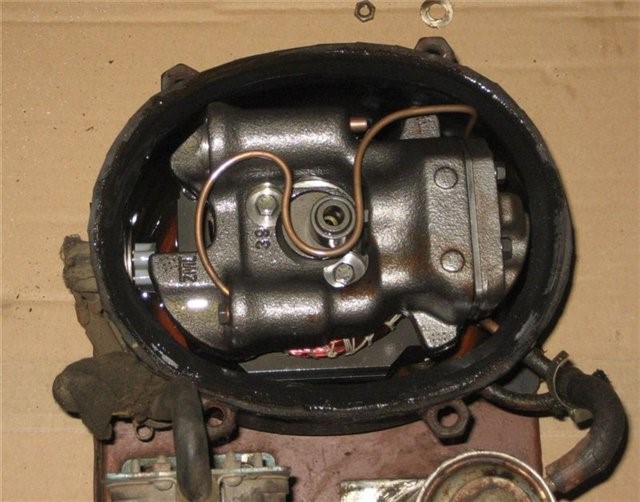
The upper "cap" of the compressor is held on the tubes
One tube will not allow the cap to exit the case; it is enough to cut it with a hacksaw. After disassembly, you can see the entire motor from the inside.
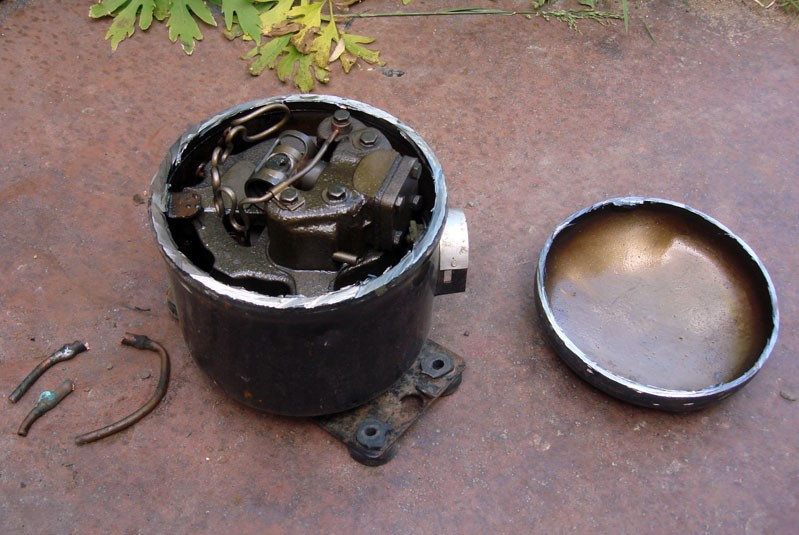
Inside view of the device
You can see the screws, unscrewing which, you can free the entire mechanism and bring it out of the case.
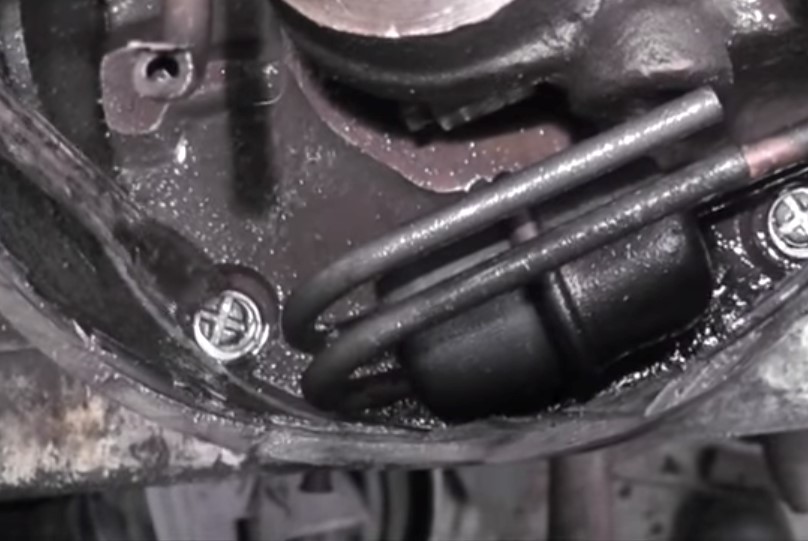
The motor is fixed to the housing with screws
Without cutting off the compressor ends, it is impossible to disassemble it, since all compressors are made in the form of a monolithic design. Both sides of the shell are welded, and screws that can solve the problem are located under a layer of thick metal and welds.
After unscrewing the support bolts, the engine, gearbox, stator and rotor are detected. To remove the copper windings and cores, do not use a grinder and cut the shell from the inside. Everything is screwed and easy to disassemble.
Video instructions
1st option
2nd option
What to do after disassembly
The wire should not be cut from the engine. First, cut off the contacts from the wires, then disassemble the stator plates, remove the rotor from the stator and unwind the wire.To get rid of soldered contacts, you must use pliers and tweezers; you should not try to force the rotor out, as this will lead to tangled wires and complicate the process of unwinding the wire.

da