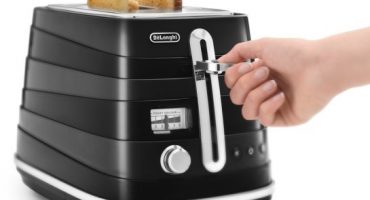
Toaster - A popular kitchen appliance for toasting rectangular slices of bread without using a pan or oven. With such bread, sandwiches are much tastier. Its design is very simple. You can repair the toaster at home, even a novice master can do it. The tireless imagination of the self-made ones leads them further - they modify toasters, giving them new, sometimes unexpected functions.
The principle of operation of the toaster and circuit diagram
The design is very simple even compared to a coffee grinder. This is a small electric stove. Outside the device is closed by a casing with two slots. Slices of bread for sandwiches are laid in them, in a wire basket they fall down, overcoming the resistance of the spring. This activates the timer. From the sides, the slices are heated by infrared emitters until they are fried. After a certain time, the timer releases the spring, and the toasted slices of bread pop out of the slots.

Scheme of the toaster in the initial (non-working) position
- A lever controls the lowering of the basket. In the lowest position it turns on the device.
- Nichrome alloy heater;
- The stop key opens the circuit. pressing it interrupts baking before the expiration of the set time and leads to the throwing out of bread;
- Lock with electromagnetic drive.
In the inoperative (initial) position, the lever and the basket are in the upper position, the lock is open, the contacts are open.

Toaster in working position
- Incandescent mica-based nichrome wire heater;
- The wire basket with a slice of bread is lowered, the ejection spring is cocked, the bread is toasted;
- The basket is fixed in the lower position by a lock;
- The electromagnetic drive of the lock is on and holds the locking strip;
- A bimetallic plate playing the role of a timer is deformed by heating measures. When lowering the basket, the contacts connecting the heater to the network are closed.
When the bimetallic platinum is heated, it bends and opens the contacts, turning off the heater and the electromagnetic drive. The locking bar is released, the spring pushes the toasted toasts. The appliance is ready to prepare a new serving.
The necessary parts for a homemade device
For self-manufacturing you will need:
- second-hand, but serviceable toaster;
- housing from the Dendy console;
- furniture hinges 10 * 20 mm;
- spring to return the plug;
- plastic plug 20 * 125 mm.
Of the tools and equipment useful:
- soldering iron;
- manual bench tools;
- drill;
- Super glue;
- thermoplastic paste "Polymorphus";
- workbench or desktop.
How to make a toaster with your own hands - step by step instructions for assembling a toaster
Self-made device for making toasts is not justified economically - the total cost of components and depreciation of the tool significantly exceed the price of the finished factory device, not to mention the cost of time spent. Usually, home masters consider the toaster as a test of strength or a means of expressing themselves and surprising friends with an original design. They remount the components of the factory toaster in original cases, such as the old VHS VCR or the old Dendy game console. Below you will learn how to make a video game console from a toaster.
As a donor, an old, but still workable toaster, purchased under an ad, was taken. The device was released at the end of the last century and had a rated power of 800 watts.Despite the contradictory appearance, it functioned quite adequately, could well fry the bread and in time (and far) threw them away.

Bottom panel of the toaster - donor
However, many years of service were not in vain. The external and internal surfaces were covered with a layer of soot and grease stains. All contaminants after a long struggle were defeated by a liquid to clean the plates from soot. On the pallet crumbs accumulated over all years of use. They also managed to shake off and wash the pallet.
After that, you can begin to disassemble the internal contents. It is carried out in the following order:
- Remove the heating elements with mica plates. Caution should be exercised - mica and nichrome wire are quite fragile;
- Remove curved wire guides for slices

Start disassembling
- Remove the lowering device, which is two wavy metal strips.

Dismantling - continued
- unscrew the contact block with the timer. Care must be taken - it will have to be mounted back;
- clean the contact block from dust and dirt, remove all old wires;
- screw the unit back onto the toaster frame;
- the right and left racks of the frame have insufficient longitudinal strength, in other words, they walk with a shaker. Therefore, they should be soldered from the outside and from the inside. To solder correctly and efficiently, before soldering the joints, carefully degrease, strip and tin.

Soldering frame joints
Next comes the turn of the plug protecting the cartridge opening from dust. It will go 5-inch stub from the computer system unit. Any similar sized piece of plastic will do.
- saw off the plug according to the size of the opening;
- fix the hinges in the opening with a soldering iron (to the frame) and superglue (to plastic);
- attach a return spring.

Crumb protection plug, inside view
The original color seemed unsuccessful, so it was decided to repaint the device in a silver metallic color - both the walls and the plugs. In the second opening, a panel with a Reset button and connectors for connecting game consoles will be mounted. For her, the same piece of plastic is taken as for a spring-loaded plug.
- saw off plastic to size and mark rectangular and round holes;
- make holes. It is fashionable to use a drill, a manual jigsaw and needle files to refine the cuts. A hand engraver or a dremel will do;
- The Reset button can be taken from any old joystick or bought in a store. This is the cheapest Chinese button for locking, without the latch in the pressed state;
- from narrow strips of PCB, glue the clip for attaching the button;
- fasten the button in the clip with superglue.

Homemade Reset Button
The next stage is the dismantling of the game console.

Prefix Dendy 8 bit
- Carefully disassemble the case;
- On the control board (located at the bottom to find the conclusions, the connection to the Reset buttons (left) and the power switch (right) and C. They will need to solder the wires;
- Carefully unsolder the cable from the PCB with connectors for game consoles and a power source (located at the top);
- Remove the board from the console body and fix it in the toaster case using hot-melt adhesive;
- The card with the cartridge connector should be secured in the toaster case, first with screws, and then quickly strengthen the thermoplastic mount. This unit will be subjected to maximum loads during operation;
- To center the board, you can mount it with the cartridge already inserted.

Board Mount with Connector
- a panel with connectors and a Reset button is also installed first on superglue, and then it is fixed with thermal paste;
- drill holes for the signal wire connectors in the side wall;
- carefully dismantle the connectors from the console and fix in the holes with superglue, fixing with thermal paste;
- The same should be done with the power supply connector.Glue hardening field to solder it to the power supply board;
- solder previously disconnected wires to the board with RCA connectors and wires from the power source;
- solder the contact group of the toaster to the contacts previously connected to the power button of the console.

Connecting a contact group as a power switch
- finally fix the spring-loaded plug;
- making sure that the cartridge does not touch the walls of the openings and is freely installed and removed, strengthen the mounting of the board with the thermal paste connector;
- in order to unload the side mounts, from any plastic profile you need to cut a rack that is suitable in size and support it with the middle of the board, resting the element of the toaster frame element with the second end. Fix thermal grease.

Strengthening board mounting with connector
Next, screw the side panels of the housing. The toaster lever will serve as a power switch, all other controls are used from the original set-top box.

A beautiful sticker printed on an adhesive film significantly improves the appearance of the device
Homemade Car Toaster
The device is useful for drivers - truckers and lovers of long-distance rallies in places not yet covered by civilization and progress.

Home-made car toaster: necessary materials
The toaster has the simplest design, is devoid of any automation and works from an on-board network of 12 volts. It is designed to heat up sausages and hot dogs.
Necessary materials
To make a toaster you will need:
- metal beer can 0.5 liters;
- nichrome spiral from any electric heater;
- wires with a cross section of at least 2.5 mm2 - 2 meters;
- crocodile terminal clamps - 2 pcs. or plug for connection to the cigarette lighter;
- heat-resistant adhesive;
- fiberglass - 0.2 m.
Step-by-step instruction
The manufacture of the device takes about an hour (most of the time will be spent on the drying of the glue) and is carried out in the following sequence:
- cut the neck of the jar;
- glue the walls of the jar with a cut-out piece of fiberglass;
- gently stretch the spiral to the state of a straight wire;
- twist together several nichrome wires and solder the ends;

Twist together a few nichrome wires and solder the ends
- the resulting multicore wire to wrap the jar, it should turn out 6-8 turns;

The resulting stranded wire to wrap the jar, it should turn out 6-8 turns
- to glue the winding with several more layers of fiberglass for thermal insulation;
- solder (or attach on the terminals) the wires to the terminals of the winding;

Solder (or attach on the terminals) the wires to the terminals of the winding
- a hole can be made in the bottom of the can to insert skewer into it and precisely center the sausage or hot dog.
The toaster is ready to use. If you don’t make a hole in the bottom, it can also be used as a boiler.
 How to fix a toaster - DIY repair
  How to wash the toaster inside from crumbs and soot
  TOP 10 best toasters - ranking 2018-2019
  How to use a toaster and device selection features
  Is bread from the toaster harmful and what is its use