It just so happened that there is a lot of gas in our rich country, but it has not been brought to my village. All residents are forced to heat their homes either with a stove or with air conditioning. I dismissed both of these options at once. Equipping a newly built house with a stove is somehow wild, and air conditioners for a comfortable stay would have to be put in each room. The exit prompted a neighbor. He installed a heating circuit at home and cut into pipes 2 one-kilowatt heating elements from boilers. The only drawback of such a heating system is that someone should always be at home to turn off the power in case of overheating. But what if I often go on business trips? It was decided to install a temperature controller that can be controlled via the Internet.
Domestic developments
Unexpectedly, the RODOS-16 thermostat relay from a Russian manufacturer turned out to be the most inexpensive. My choice was also influenced by the fact that all the drivers and programs that were laid out for public use for free, as well as detailed instructions for connecting in Russian, were provided on the site. They also ordered two temperature sensors. Also inexpensive, about a hundred in my opinion apiece.
Appearance, pin assignment
The package arrived in 4 days. The device is a small plastic box made of fairly dense plastic. All pins on the board are soldered well. It looks like this.

This seemingly plain-looking box turned out to be a real storehouse for automation. Now look at the inputs and outputs and you will understand why.

- Switched lines are connected here (the “NC” contact with the relay turned off is connected to the “COM” contact, and “NO” is disconnected in the meantime; When the relay is on, the “NO” contact is connected to the “COM” contact and the “NC” contact is disconnected )
- Logic outputs (galvanically isolated).
- Logic inputs (also galvanically isolated).
- Connectors for soldering humidity and temperature sensors.
- These connectors allow you to connect REX-1 (DS18B20) - specialized temperature sensors.
- In these, you can connect the REX-3 (BMP180) - atmospheric pressure sensor
- REX-5 - humidity and temperature sensors are connected here.
- Through this Ethernet connector, the device is connected to the network using a standard RJ-45.
- An LED signaling the various conditions of the RODOS-16 itself.
- Reset to factory settings.
- These LEDs turn on when the power relays are in a closed state.
- The power supply is connected here. A plus here is the internal connector.
Endless possibilities
In theory, in Rhodes-16 the opportunity was realized to automate the house as you like:
- Set a constant temperature in the pool (if I had one);
- Create a microclimate with artificial ventilation;
- Automatically turn off and turn on electrical appliances.
In principle, for the latter I bought it.
The sensors have a meter long cable. To install them in different rooms, one of them had to be lengthened. With the presence in the district center of a specialized store with hundreds of extension cords, cables and adapters, this was not a problem. I put one sensor in the kitchen, in which, according to my feelings, the air heats up most quickly. The second is in the bathroom, which is the coldest in the house. In general, after a couple of days of small adjustments and practical experiments with moving the sensors higher or lower, the temperature in the whole house turned out to be optimal.
Connection and setup for Windows 10
RODOS-16 is connected via a standard twisted pair cable to the LAN port of a hub or router. The cable is connected via the RJ-45 standard.
The device connects almost automatically if the network has a standard set of settings. network equipment running on your local network. After all the cables are connected, you need to use the Network and Sharing Center, which can be accessed through the Start menu. In it you need to get to the “Change adapter settings”, in which you need to find “Local Area Connection”. In the properties of TCP / IPv4 you need to enter your UP. All. We reboot the computer and enjoy the thermostat. There are several ways to manage it.

From a special web interface
I’ll tell you in advance about one mistake that I made. I am so accustomed to using the TOR, that out of habit I opened it. Naturally, he began to "swear" at my IP. After that I opened another browser. I will not call him not to advertise. I can only say that the program works without problems with:
- Google chrome
- Firefox
- Opera
- Mozilla
- Safari
- A standard browser preinstalled in the operating system.
The main menu immediately opens, in which the operating characteristics are indicated. It looks like this.

I almost forgot - the initial username and password are admin. By the way. I did not change it. It seems too much today developers devote security. I don’t think any hacker would be interested in cracking or picking up a password to control the temperature in my house.
To start managing RODOS-16 and its settings, just click “Setup” and javascript should still be open.
How to manage channels manually
To do this, go to the “Manual control” tab. External load channels are called here “Relay 1” and, accordingly, “Relay 2”. Logic outputs are designated “OUT 1” and “OUT 2”. The rest is simple. If the button says “On”, then the thermostat contacts are closed. If “Off” - open. I will write here in more detail.
• ON - the output turns on (contacts COM and N.С. open, COM and N.O. (or the contacts of the logic output) - close.
• OFF - the output is turned off (COM and N.O. contacts are opened, COM and N.O. (or logic output contacts) are closed.
When each channel is turned on or off, a green LED lights up (or goes out) next to it. Thus, you can learn about work without looking at the computer.
Important! When you turn on automatic temperature control, it is considered a priority over manual.
In the “NarodMon Project” tab, you can configure everything so that messages are sent to the server automatically, and after every five minutes the report on the operation of the thermostat comes to the mail in the form of numbers or a graph, as it is more convenient for anyone to perceive.
Important! It is useful to know that for the convenience of users, the developers of the program have provided the “Test” button, thanks to which you can immediately check the correct operation and the availability of the Internet. This approach allows you to save a lot of time during settings, it is especially useful if the replacement of operands in the automatic contact management program takes place too often.
Do not forget to change the “Save & reboot” button after changing the parameters.
Using direct HTTPrequests
Using a table with HTTP requests, you can also quickly learn how to operate with commands. Here is a table with the most commonly used commands.

Correct reset
A huge number of gadgets gave rise to various standards for resetting the device and returning the device to its original level with factory settings. RODOS-16 has some differences compared to all the usual methods.
The Reset button here needs to be occupied more than once, and hold it for about 2-5 seconds, until the red LED lamp blinks.
Nuances of installation and operation
On its website, development engineers repeatedly recall that thermostats and remote temperature sensors themselves can work in any conditions. And in this the employees of the company involved in the development of RODOS-16 are by no means cunning.When I wanted the temperature in the room to rise as quickly as possible, I somehow put the sensor out the window, forgetting that water would pour on them in the rain. But for 4 months of use, absolutely nothing was damaged.
findings
I really liked the thermostat, although this is my personal, subjective opinion. I quite simply described the programming process here. But it is so intuitive that anyone can figure out after installing a bookmark in a browser to learn how to use the utility.
To the pluses, I would also mention the fact that on a Russian-language site with a friendly interface, there are many approximately the same devices for various purposes that can be programmed for any work. All of them, according to the assurance of the leaders of the online store, have perfect compatibility, are durable, and rarely create problems during operation.
Verdict: I advise RODOS-16 to all artisans who are able to build a "smart home" at least 4 times cheaper than using masters. The cost of equipment, including not only thermal relays, but also thermal sensors is minimal compared to Chinese options. Here I was very much surprised.
 Everything about boilers - from choice to connection
  How to disassemble a boiler using the example of Ariston, Gorenje, Termex models
  Why the boiler does not turn on on the example of Termex and Ariston
  Faults and repairs of the boiler Termex, Ariston and other brands
 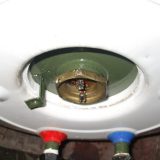 How to remove and change the heater from the boiler - necessary tools and instructions