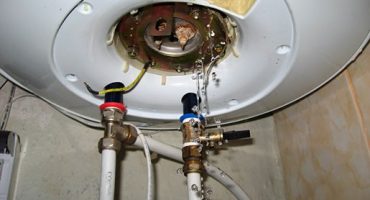
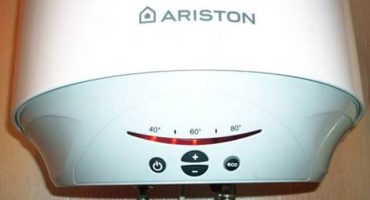
The most common water heater today is a storage electric boiler. With simple controls and straightforward connections, equipment plays an important role in the supply of hot water.
The main criterion for the end user in choosing a water heater is the volume of the storage tank. Less commonly, the device is selected due to the model and internal design. The technical data sheet does not always tell you about the necessary servicing points for this unit, which leads to malfunction and replacement of boiler parts.
Being one of the main elements in the operation of the equipment, the electric heater can fail at the most inopportune moment, which entails the need for quick repairs if the water heater is the only source of hot water.
Step-by-step instructions for replacing the heater in the boiler using the example of "Ariston" will help to independently carry out all the necessary work to eliminate and replace the electric heater.
The internal design of the water heater and the principle of operation of the heater
Electric storage water heater is a container made of steel or stainless alloy, capable of storing and maintaining the set temperature of water until it is fully or partially used. For all these functions in the boiler stands a heating heater, which is made of copper alloys. The average indicator of its power is 1.5 - 2.0 kW.
The design of PETN can be performed in two forms:
- Ten dry - is a heating element in a protective housing that does not come into contact with water.
- Submersible heating element - a heating element without a protective layer, often called "wet heating element".
One and the other type of PETN do not have special advantages, while the magnesium anode performs its protective functions.
Magnesium anode - a protective rod that is included in the package of any water heater. Being more active and reacting with water first, it prevents the oxidation of the PETN and the walls of the boiler tank. All electrochemical processes occurring inside the water heater are reflected on this element and gradually destroy it.
At the moment when the protective rod is exhausted, other elements react with water, and in this case, the wet ten will be the first to corrode, since its copper alloy is more active than steel or stainless steel. In the event of failure of such a boiler, only the heating element needs to be replaced. And in a boiler with a protected heating element, electrochemical reactions affect only the walls of the equipment, which leads to the destruction of the tank. As a result, the water heater gives a leak and becomes unusable and can be repaired.
Boiler maintenance consists in the regular replacement of the magnesium anode. This procedure must be carried out every 6 to 9 months, depending on the composition of the water.
But what if the anode was not replaced on time and the ten became unusable?
Step-by-step instructions for replacing an electric heater
The entire procedure for replacing the heater in the boiler must be approached with accuracy and caution. In order to avoid damage to other parts, it is recommended that you carefully study the entire manual before proceeding with maintenance of the equipment.
Reasons for repairing a water heater:
- Water does not heat up.
- For a long time waiting for heating water.
- Frequent on / off.
- Turbid water with an unpleasant odor.
Depending on the model, the heating element mounting in the boiler is presented in three forms: a large nut of size 55, a clamping plate and a flange with mountings in a circle.
Replacing the heater in a boiler with a fixing nut 55
At the initial stage of repair work, it is necessary to de-energize the equipment. Shut off the cold water supply with a stopcock and only after that proceed to disconnect the pipes or flexible hoses connected to the boiler. Having prepared the container and the hose in advance, use the key to unscrew the connection of the water supply system together with the boiler safety valve. In this way, a faster discharge of water is ensured. Bring the hose into the sewer and put it on the threaded part, after substituting the container under the water heater.
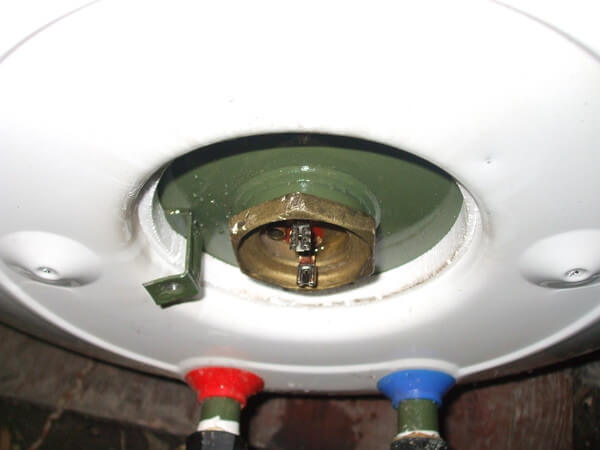
Water heater with nut 55
After there is no water left in the boiler, the next step will be to remove the protective housing. By unscrewing two bolts for a cross-section screwdriver, the bottom cover of the water heater is removed. Under the protective case there is an electrical connection to the heater and thermostat. The outer part of the entire structure of the water heater is located there, in the form of a fastening nut.
Before disconnecting the terminals of the electrical wires from the automation, it is necessary to fix their correct connection. You can take a photo or transfer it to paper with an exact indication of the connection (wires are usually of different colors).
All nuts are unscrewed counterclockwise and, if necessary, the boiler can be removed from the wall and turned upside down, after which it can be disassembled.
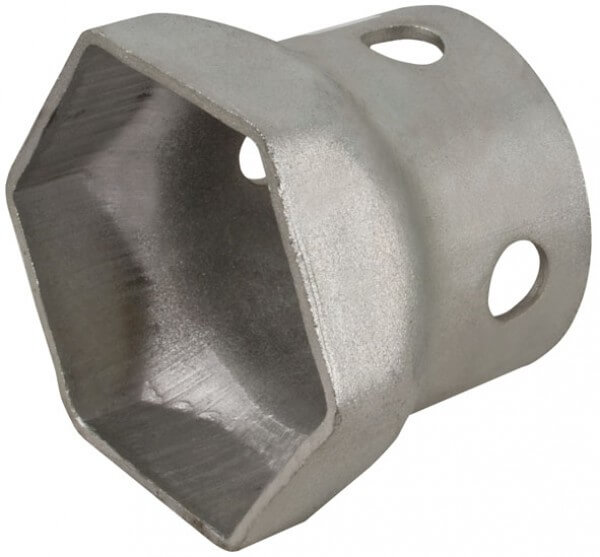
55 key
With a gas wrench No. 2 or wheel with a size of 55, carefully turn it by unscrewing the nut. It is possible that during the use of the water heater, a large amount of scale has formed on the PETN, which does not allow pulling out the heating element. For this, it is necessary to bring down the growths a little with a non-sharp object.
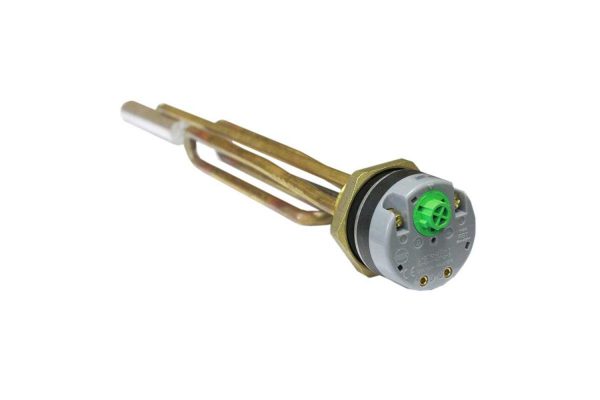
Equipped with a magnesium anode and thermostat
Before installing a new PETN, it is worth paying attention to the state of the magnesium anode. In most cases, the protective element is completely destroyed, where instead of the anode there is only a threaded rod on which it rests. The magnesium anode is purchased separately and is the basis for the quality and duration of the heating element. Before purchasing a protective element, it is necessary to verify the exact diameter of the threaded connection and the thread pitch by screwing the rod into the space provided for it.
Required tools: No. 2 gas wrench, wheel wrench, positive screwdriver.
Replacing the heater in a boiler with a mounting bracket
In more modern boilers, where instead of the fastening nut, the clamping plate protrudes, the internal design will be slightly different.
All sequential actions until the main nut is untwisted take place in a standard manner. Also disconnect and shut off the water, remove the protective cover and fix the correct connection of the electric wires and disconnect them.
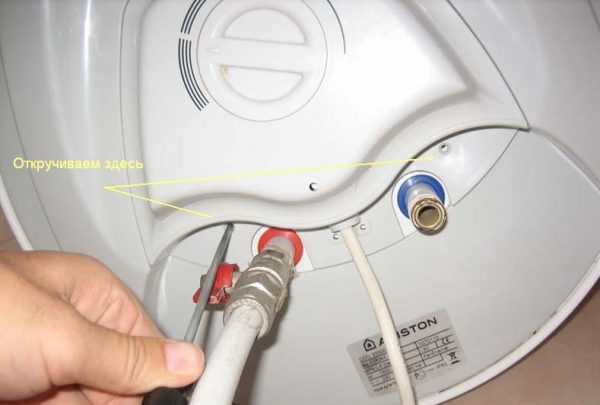
Unscrew the bolts securing the protective housing
An important and main rule when disassembling this type of boiler is the lack of the ability to turn the water heater over. The electric heating element is fixed on the main nut so that when it is unwound, it will fall inward, damaging the inner wall of the water heater. Therefore, all replacement and maintenance work should only be carried out in the standard position of the water heater.
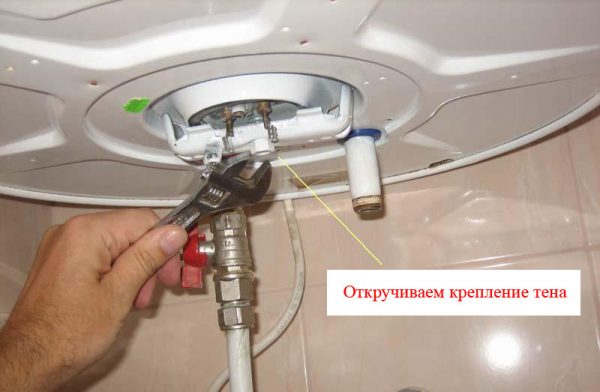
Model of a boiler with one nut and a fixing level
The thermostat is removed as well as in any Ariston water heaters. With a sharp movement, disconnect the thermometer from the entire structure.
The main nut is pulled to the mounting plate, untwisting which you can get a flange with PETN. Before pulling out a flange, it is necessary to swing it a little and scroll.
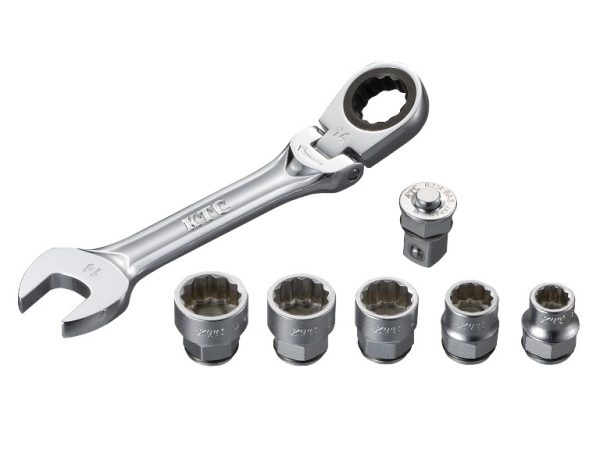
Ratchet Wrench Set
Pay attention to the state of the magnesium anode and, if necessary, change it.
Necessary tools: ratchet wrench, socket wrench, plus screwdriver.
Replacing the heater in a boiler with a flange and fixtures in a circle
Already in newer and more popular versions of Ariston water heaters, a flange with fastening bolts in an amount of 4 to 6 is installed.
All standard operations should be carried out in the same sequence as with previous types of water heaters. Disconnect power from the equipment and drain the water, remove the protective cover and fix the location of the wires and disconnect. It is necessary to unscrew the safety valve without fail, since it will interfere with the unscrewing of the bolts.
In this type of water heater, the heater is located on the flange, which is bolted in a circle, and in even newer versions of the equipment, the nuts are screwed onto the built-in studs.
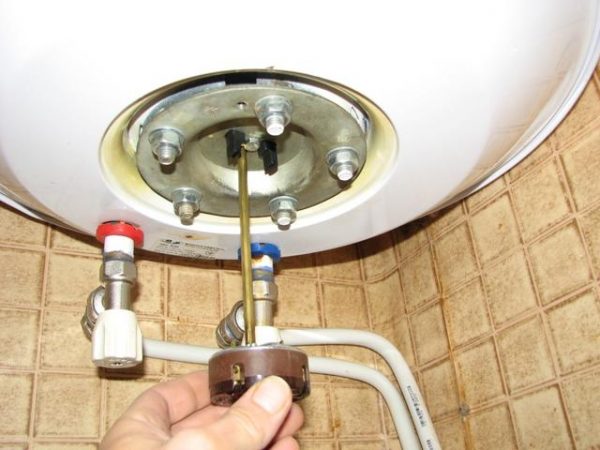
Disconnecting the thermostat from the water heater
The process of disconnecting the thermostat from the main structure has not changed - remove it from the clips with a sudden movement, after disconnecting the wires.
To unscrew bolts or nuts, a socket wrench or ratchet wrench of an appropriate size is well suited.
Unscrewing the fasteners, you can remove the flange from the tank of the boiler on which the heater is held. Always pay attention to the magnesium anode. If the wear is strong, then it is worth replacing it so that in the near future not to carry out such procedures only to replace the protective element.
Replacing the heater in a flat boiler and replacing the dry heater
A flat water heater can have two heating elements, and in order to understand which one has failed, it is necessary to dismantle both heating elements. According to the already prescribed scheme, carry out the process of replacing the damaged heater. The principle of promotion of fasteners is no different from conventional water heaters with one heating element.
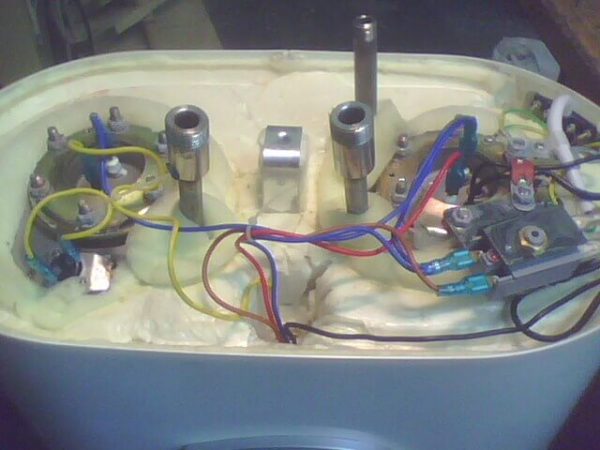
Model of a water heater "Ariston" with two heating elements
The boiler with a dry heater has a protective flask inside the tank, which slightly distinguishes this type of boiler from the standard ones, but the location of the nuts and all fastening parts do not differ.
Necessary tools: socket wrench, ratchet wrench, plus screwdriver.
To extend the life of the equipment, you should follow a few rules:
- Service the water heater twice a year.
- Do not heat water above 70 degrees.
- Install a filtration system.
Important! When reassembling the boiler, ensure the integrity of all gaskets. In order not to break the thread, pay great attention to the tightening torque of nuts and bolts.
When replacing PETN, it is advisable to change the magnesium anode. Its cost is not high, but to protect the new heating element is for the longest possible time. It is also necessary to wash the internal tank during each disassembly of the water heater.
 Everything about boilers - from choice to connection
  How to disassemble a boiler using the example of Ariston, Gorenje, Termex models
  Why the boiler does not turn on on the example of Termex and Ariston
  Internet thermostat RODOS-16 - smart warm home in autonomous conditions
  Faults and repairs of the boiler Termex, Ariston and other brands