Malfunctions of a domestic heater deprive many amenities. In order to independently repair the electric heating device and not contact the masters, all procedures must be strictly followed. Individual work can be done independently. We offer you to familiarize yourself with useful information.
Necessary tools
There are several reasons why you need to disassemble the technique:
- warm water is cloudy, there is an extraneous odor;
- scale flakes visible;
- when you touch the case, a current discharge is felt;
- when the tank is turned on, the machine is triggered;
- the device heats water for a long time or does not heat up at all;
- water slowly gathers;
- weak pressure of warm water at the exit;
- leaking body.
To disassemble and further assemble the Termex water heater, Aquaverso es30v, Oasis, you must use the following tools:
- Screwdrivers - straight and cross-shaped.
- Wrenches. You need a universal or universal gas spanner - the size of the horns is 22; 14; 10; 8, for individual models may need 32, 24 mm.
- Slotted screwdriver.
- Hexagon 4 mm.
- Pliers.
- Indicator screwdriver.
Additionally, water-absorbing material is required to wipe the parts.
Step-by-step instruction: remove the lid from the domestic water heater
The boiler is disassembled in several stages, which can be handled successfully if you know exactly how to remove the cover from the domestic water heater.
We advise you to disassemble the structure in the following sequence:
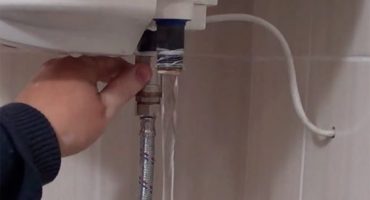
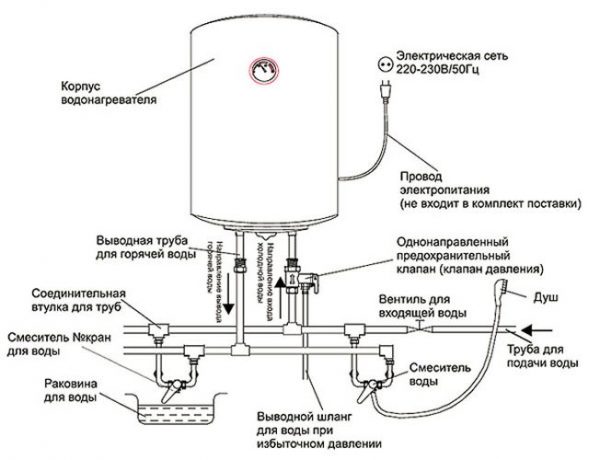
- Shut off the water supply. In most cases, the valve is located at the bottom of the housing.

Location of cold water valve
- It is necessary to disconnect the equipment from electrical networks. If the device is not connected directly, but through a surge protector, it is better to completely unplug the extension cord from the outlet and remove it from the room, since devices connected to the network only increase the likelihood of a short circuit.
- Further it is required to drain water from the hose put on a drain branch pipe. It is better to pour it into a basin or bucket, and then into the toilet. This will prevent the drainage of the bathtub or sink from accumulating scale.
- Unscrew the screws with a direct screwdriver and remove the protective cover from the bottom of the case. The tight-fitting lid is removed very slowly - as if they were unscrewing the lid on the can from canned food. It is very important not to damage the enamel.
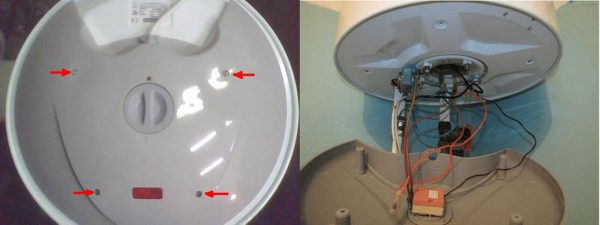
Removing the protective cap from the tank
- After removing the cover, using an indicator screwdriver, it is necessary to determine the voltage at the terminals. To do this, alternately ring all the contacts, touching the iron cap of the screwdriver. The lamp in the screwdriver should not light up or blink in any of the cases.
- Next, you need to free the tank from water. It is necessary to wait until the contents of the tank have cooled. Some models need to be removed from the wall. In this case, disconnect the hoses for supplying hot and cold liquid.
- If the equipment still cannot be drained under warranty, otherwise it may be considered as not a warranty case. This is necessarily indicated in the instructions or warranty card.
To drain, you will need a gas wrench and a hose. The sequence of actions for releasing the water heater from water is as follows:
- turn off the cold water supply with a gas key - valve for incoming water;
- open the hot tap on the mixer - in order to avoid vacuum;
- drain the water to the mark - it will take from 1 to 10 minutes;
- do not close the mixer, open the tap and let the water drain, you can also just twist the nuts at the inlet of cold water and the liquid will easily merge;
- connect the water outlet hose to the heater thread, lower its other end into the sink or any container that is deep enough;
- then disconnect the hot water outlet hose from the body - in this way we will get rid of the accumulated liquid around them;
- when you unscrew the nuts, the remaining water will finally merge from the water tank.
Empty small tank of water residues
This method of draining residual water is suitable for units whose volume does not exceed 20 liters. Most often, these are Termex, Ariston, Oasis. If the tank volume is large or a valve is installed without a lever, you will have to remove the water yourself. It is impossible to unscrew such a part, but you can press the spring yourself. It is located in the direction of the water into and out of the tank. It is more convenient to do this with the help of an elongated metal object - a wide needle, nail or drill.
An example of such a drain of water, see the video:
Before disconnecting the wires, it is recommended to sketch or photograph the features of their connection.
After that, proceed to unscrew the nuts fixing the tubular electric heater (TEN) and the thermostat. This should be done so that the remaining drops of water or condensate run off gradually. Remove the heater and thermostat. Wipe them with a dry flannel rag so that you can check the wear of the gasket on the heating element flange.
This ends the analysis of the device - the cover is removed.
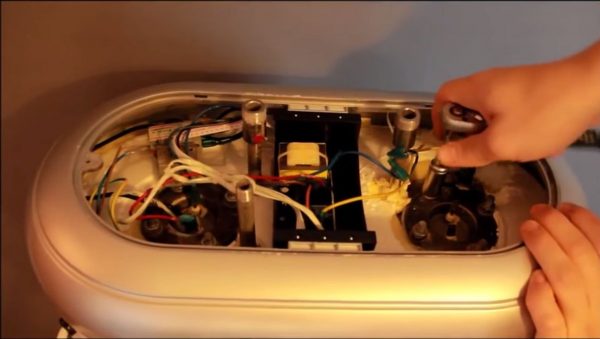
Type of tank after removing the cover
Further, equipment is cleaned or parts are replaced. So that independent actions do not lead to new problems, adhere to the recommendations of experts.
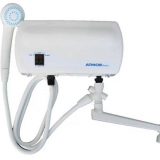 What is a instantaneous water heater, how does it work and how to use it
  How to properly drain water from a water heater
  Set the temperature of the water heater and determine by the strip
 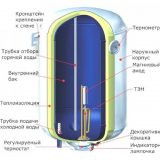 Do-it-yourself dismantling of the water heater and individual parts
 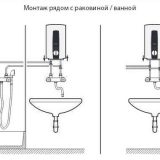 Installation and connection of instantaneous water heater - step by step instructions